


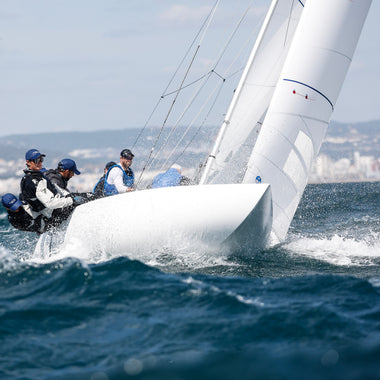


J/105 TUNING GUIDE
Download the North Sails J/105 Tuning Chart
Part 1: Boat Preparation & Rigging Setup
Before touching the rig, getting the boat itself right is important to top level speed. The following covers boat preparation fundamentals, followed by rigging recommendations that will help you get the most from your North Sails and make the boat easier to sail.
Minimum Weight
Keep the boat at minimum weight— anything not required is slow. Remove everything that isn’t needed for the race. Store all required gear as low as possible. No redundant dock lines, cooking gear, unnecessary tools, or cruising equipment. No bilge water. Crew weight is movable ballast and the one exception — position it deliberately, as described in Part 5.
Rigging Modifications
The following small changes should be made to stock J/105s to make the boat easier to sail and get the most from your sails.
Head Swivel Shackle
North Sails jibs come with a webbing loop at the head. It is critical to have a 90-degree “twist” shackle to attach the sail to the swivel. A standard shackle will cause a hard spot at the top of the jib as the sail is twisted.
Remove Backstay Toggle
Many J/105s come with a toggle that rotates the hydraulic cylinder 90-degrees so that the handle faces forward. While it is nice to have the handle forward, this toggle reduces the throw of the backstay adjuster too much so that you cannot get enough tension in heavy air. Some of the older boats need to have the backstay rod shortened to get enough backstay throw.
Change to 4:1 or 6:1 Cunningham
The standard Cunningham is 2:1 and led aft to a cabin house halyard stopper.
This system should be replaced with the lower purchase with integral cleating shackled to the ring on the top of the Quik Vang (a common fitting on J/105s, though not universal — check your boat’s vang setup). This allows for easier and more precise Cunningham control by a forward crewmember. Many boats then rig the asymmetrical tack line through the free stopper.
Mark the Tack Line at the Cleat
Put marks on the tack line at the proper range of settings. As you approach the windward mark, you can pre-set the tack line so that when you extend the pole and set the spinnaker, the tack will be set properly. The tack line is much easier to work with in this placement than on the side of the cabin house.
Move Mainsheet Swivel Base Forward of the Traveler
This allows for easier trim of the gross tune by the main trimmer, especially when tacking.
Tapered Spectra Spinnaker Sheets
These sheets have a light uncovered portion that attaches to the sail, with a covered portion that goes on the winch. The sheets should be 3/8” Spectra cored line with the cover removed at the sail end of the sheet. These lightweight sheets are used in all conditions and help downwind performance in light air. Heavy sheets pull down on the leech of the spinnaker in light air, closing the leech too much.
Jib Sheet Attachment
The jib sheets should be attached to the jib clew with a soft shackle. If both sheets are tied into the same loop, the clew ring on the sail will not twist when weather sheeting.
Turnbuckle Maintenance
It is important to service your turnbuckles so they can easily, quickly and safely be adjusted. This entails taking them apart, cleaning the studs and turnbuckle, and applying an anti-seizing grease. Caliper numbers make returning the shrouds to base tune very easy!
Part 2: Rig Set-Up and Preparation
Tools and items required: Loos RT 10M Rod Tension Gauge (a wire tension measuring tool, available at most rigging suppliers), 2 wrenches and 50’ metric tape measure.

Part of the success of growth of the J/105 Class is the tight class rules and limited sail inventory. In the extreme conditions of light and heavy air, the rig must be manipulated to enhance the sail shapes for those conditions. The result of proper rig tuning is the correct relationship between mast bend and headstay tension to get fast shapes. The North inventory has been designed to make these transitions easily with the correct tuning to be fast in all conditions.
Step One: Set Mast Rake
Mast rake is set by the headstay length. We recommend the old class legal maximum rake, 13.035m (42’9.125”). Hoist a crewmember up the mast and have them hold the butt of the tape measure at the center of the pin that secures the forestay to the mast. Measure to the to of the furler drum (measurement A), then measure from the top of the furler drum to the bottom of the furler drum (measurement B), then from the underside of the furler drum to the intersection of the stem and sheer line of the boat (measurement C). The overall headstay measurement is then the sum of A+B+C.
If the headstay needs to be lengthened, add the toggle at the top of the headstay rather than the bottom — you want the jib tack as close to the deck as possible.
Step Two: Centering the Spar
Put a mark on the rail of the boat on one side even with the chainplates. Measure this distance from the headstay attachment on the bow. Put a corresponding mark on the other side, the same distance from the headstay. At this point the Upper Shrouds (Caps) should be tight, and the Intermediates (D2s) and the Lowers (D1s) should be very loose. Hoist the tape measure to the top on the centerline jib halyard. Measure the marks on either side and adjust the Caps till the mast is centered at the hounds.
Step Three: Check J Measurement
The J measurement is the distance from the headstay intersection to the deck at the forward face of the mast. This should be 4.14m.

Note: Measure to the headstay/deck intersection
Step Four: Centering the Partners
Move the mast side to side (athwartships) at the partners until the mast goes perfectly straight side to side. Then secure the partners at that point while maintaining the proper J dimension (4.14m). Spar tight is a good option. It is unlikely that the location you found will be the center of the partner hole.
Step Five: Check Mast Butt Position
Loosen the mast butt bolts. The mast should want to go straight on its own like a spring. Sight up the mast and confirm there is 0 prebend. Mark the floor at the forward edge of the mast step.
Bring the mast back 3/8” (9.5mm) from this mark and tighten the bolts.
Note: Prebend can be checked by holding the main halyard to the gooseneck. Sight up the mast and check the distance between the mast and the tensioned halyard.
Step Six: Tensioning the Shrouds
Tighten the D2s and D1s to hand tight. Make sure the caps read 41. Then tighten the D2s to 17. This should be done incrementally (2-3 turns at a time per side) sighting the mast to be sure that the mast is straight up and down (in column). Add turns to one side and remove turns from the other to bring the mast in column. As you add tension to the D2’s the cap shrouds will become slightly looser, so be sure to add tension to keep them at 41.

Note: Whenever you are checking rig tension, make sure the backstay is totally eased and the boom isn’t loaded.
All Purpose Base Tune (10-14 kts)
Caps: 41
D2s: 17
D1s: 8 (just taking tension)
San Francisco Base Tune (for consistently strong breeze, typically 15–25 knots)
Caps: 55
D2s: 25
D1s:10
You should double check to be sure that the mast is still in column at the dock when the rig is at full tension. At the base setting, the mast should sit with virtually no pre-bend.

You are now at the “base” setting and ready to go racing. From here, follow the Tuning Matrix for various wind conditions.
Advanced Tuning – Beyond the Numbers
Understanding the fundamental concepts of how tuning affects the rig and sails is important to be able to check that the settings are right for your boat, as well as customizing your own tuning numbers for your sailing style. Keeping good records is key. Keep a Wet Notes pad on your boat and record your rig settings, wind speed, sea state, and your speed and pointing relative to other boats. This will help you to see what is working best for you and fine tune your own numbers.
Changes to shroud tension affect the rig in two ways: 1) headstay tension & 2) mast bend. Tighter Cap shrouds generate more headstay tension by pulling back against the headstay. Tighter D1 (lower) and D2 (intermediate) shrouds generate more headstay tension by reducing mast bend. Tight D1s and D2s will make the mast straight (main full and draft forward) when no backstay is used, and conversely loose D1s and D2s will allow the mast to bend (main flat or inverted) when a lot of backstay is used. The final D1 and D2 rig tension will depend on mainsail shape you need for the conditions.
Part 3: Mainsail Trim
The J/105 relies on much of its power from the mainsail with the class inventory. The mainsail is very easily adjusted because there are many shape controls including mainsheet, traveler, backstay, cunningham, vang and outhaul. Proper mainsail trim is achieved by balancing the speed and pointing with its twist, angle of attack and overall power. Proper communication with the helmsman for the feel of the boat and performance vs. the boats around you are the key to establishing the correct balance of those three elements.

Mainsail Angle of Attack — The Traveler
The traveler controls the boom angle to the centerline of the boat, which is described as the angle of attack to the wind. Much like the sheet, a narrow angle of attack (traveler high) is used for pointing and powering up the boat. A wide angle of attack (low traveler) is used for acceleration and depowering the boat. Carry the traveler as high as possible without making the boat heel too much or getting too slow (drag).
In light to moderate conditions, the boom should be on centerline or slightly above. In very light air, when the main is twisted, setting the boom above centerline will put the lower third of the main parallel to the centerline of the boat.
As the breeze builds, the traveler should be played aggressively to control heel and keep the boat on its feet. The traveler should not be dropped below centerline as this makes it harder to twist the leech and closes the slot. If the boat heels too much, the helmsman will have to use the rudder to keep the boat going straight. This can create a lot of drag. Rudder angle can be monitored by putting a tape mark on the top of the wheel when it is perfectly straight. The main trimmer should notice when the helmsman is using too much helm (or not enough) and adjust appropriately.
Mainsheet vs. Traveler for Various Sea States
One of the more difficult things to determine is how to depower the main in moderate to heavy conditions. You can depower the main with twist by easing the sheet, letting the traveler down, and pulling on backstay. The technique used should be determined by sea state, which will affect how the helmsman needs to steer.
In flat water, the helmsman should be able to use very subtle steering changes. Hours of on-the-water testing has shown us that depowering by lowering the traveler and keeping a tight, untwisted leech produces the best VMG (Velocity Made Good — your effective speed toward the mark). You can point reasonably high in flat water without slowing down and the tight leech will help with pointing. We have found that twisting the main in flat water in moderate air only makes you lose height. With this style the traveler is played to maintain the proper angle of heel.
However, in waves, the opposite has proven to be faster. In choppy conditions the boat needs power to get through the waves without over heeling. Keeping the traveler higher (car above centerline) with less mainsheet allows the helmsman to steer through wider angles and accelerate. A slightly higher traveler helps keep the bottom of the main engaged, providing power, while the top twists off to reduce heeling. With this style, the mainsheet fine tune is played to maintain the correct trim and angle of heel.
Overall Power – The Backstay
The backstay is the most important sail control for setting the overall power of the sail plan. The backstay is the universal control to modify the shape of the main primarily, but also the jib. The North Inventory has been carefully designed so that backstay adjustment changes the shape of the main and jib in unison. As backstay is applied, the mast bends, flattening the main. It also pulls aft against the headstay, reducing headstay sag, which flattens the jib. By flattening the sails, the boat’s power is reduced.

How mast bend works with the luff curve built into the sail. The sailmaker designs extra curvature (luff curve) into the mainsail luff; when backstay bends the mast forward to match, the extra cloth is absorbed and the sail flattens.
As stated in the tuning section of this guide, having the rig set up properly for the wind conditions allows you to get the most benefit of the backstay, but it is also the control that allows you to set up the sails as best you can when the wind changes and you are no longer tuned correctly.
With a loose rig for the conditions, the main will flatten out faster than the jib. The loose D1s and D2s will allow the mast to bend, which will flatten the main. However, since the mast is bending, the main will get to a point where it over bends (large wrinkles from mast towards clew). By not being able to pump on more backstay, the jib will still be a bit fuller than is ideal as the mast is not stiff enough (overbending with loose D1+2) to fully tighten the headstay.
It is important to understand how backstay and rig tuning affects sail shape when you are caught under or over tuned. If your rig is too loose for the conditions, use the backstay to set the main up flatter, knowing that your jib will be fuller than ideal. You can also drop the traveler to center and use more mainsheet tension, which will help tighten the forestay. Use the cunningham aggressively to smooth out the sail.
If your rig is too tight, use less backstay to set the main up fuller, knowing that your jib will be flatter than ideal. You can also sail with a slightly higher traveler and loose mainsheet to help sag the headstay. It’s much easier to depower the J/105 than it is to power it up, so always tune for the lulls!
As the mast bends, it has an immediate effect on the luff and leech tension, so other controls must be adjusted in conjunction with the backstay. When you pull the backstay on, the mainsail will twist more so more sheet will have to pulled on to reset the twist. It is especially important when easing the backstay to also ease the mainsheet. Watch the top batten telltale as the backstay is eased!
We recommend taping a batten with marks every 1” on it to the backstay cylinder. This will help you to be able to record your settings and duplicate them later.


Backstay quick-reference: key controls by wind range. Use in conjunction with the Tuning Matrix.
Sailing the J/105 flat
The J/105 does not like to heel. In general, sail the boat as flat as possible — a skilled driver will keep it flatter than you think is necessary, and the boat will reward it with better speed and less weather helm. From around 11 knots true wind, the full crew should be fully hiked.
A boat sailing upright is easier for the helmsman to steer accurately and makes it easier to find and hold a consistent groove. Heel triggers weather helm, weather helm requires rudder angle to correct, and rudder angle creates drag. That chain of cause and effect is the main reason boats sail slower heeled over than flat. The most important indicator is rudder angle — if the helmsman is fighting the helm, depower the boat further before trying any other adjustment.
Other Mainsail Controls
Cunningham
The cunningham controls the luff tension of the mainsail. Luff tension controls the draft position of the mainsail. As backstay tension is applied, the mast compresses and the draft will move aft. Pull on the cunningham to move the draft forward to the desired position. As well as moving the draft, luff tension will also make the main somewhat flatter. In light air, you should see slight wrinkles coming from the sail slides. In moderate air, the luff should be smooth. In heavy air, the luff should be tensioned past being smooth to set the draft position and flatten the sail. When going around the weather mark or powering up, ease the cunningham first, before easing the backstay.
Vang
In underpowered conditions, for the mainsail to generate enough power, a certain amount of depth has been designed into the lower portion. In over 15 knots begin to pull on the vang to induce low mast bend to flatten the lower third of the main. Be sure to ease the vang at the weather mark! Before you ease the main, ease the vang to allow the main to twist as you bear off. CAUTION: If the vang isn’t eased before bearing away, you may not be able to bear away, or worse you could break the boom.
Outhaul
The outhaul also controls the sail shape in the lower third of the mainsail. Easing the outhaul makes the lower third of the mainsail fuller, and tightening flattens the lower third. In light air, the outhaul should be eased a few inches. It should be pulled slightly harder as the wind increases, but there should always be slight depth at the foot shelf.
Part 4: Jib Trim
The 3Di AX Jib uses modern grand prix technology. Our new design has been refined to be responsive to the controls that can change the shape. 3Di technology uses high modulus filaments on a full-size mould, to create a one-piece, lightweight, durable sail.
The primary controls that affect sail shape are the halyard, sheet, jib lead placement and headstay tension. The HELIX luff structure multiplies the effects of halyard tension, allowing for dramatic depth control.

Jib Halyard
The halyard is the most important sail control for shaping the jib. Just like the cunningham on the mainsail, the halyard controls the entry angle, draft position, and overall depth in the sail. A tighter halyard will produce a more draft forward, rounded entry shape, with less overall depth. A loose halyard will produce a more draft aft, finer entry shape with more overall depth. As a general rule, the halyard should be tensioned to just barely remove the wrinkles in the luff. In lighter air very small wrinkles can just be visible, in moderate air the luff should be smooth, and in heavy air the halyard should be pulled past removing the wrinkles.
In flat water, a looser halyard (very slight, small wrinkles in the bottom quarter of the jib) can improve pointing with a finer entry angle. In waves and chop, a tighter halyard will produce a more rounded entry and more open leech, which will have a wider steering groove and be better for acceleration. If you try the loose halyard and your helmsman seems to be struggling to find the groove, try a slightly tighter halyard.
As sails age, the entry tends to get finer and the draft starts to move aft. An older sail will require more halyard tension to achieve the same shape as a new sail.
Our HELIX luff multiplies the effect of the halyard tension. As you can see in the photo below, the luff design spreads the halyard load. More halyard tension will flatten the sail, less will make it fuller. This helps sailors adapt to changing conditions quickly.

Leeward Jib Sheet
The leeward sheet is the most important control for adjusting the jib. The general rule is to trim the jib as hard as possible without stalling the upper leech telltale.
The leeward jib sheet will need to be adjusted depending on how much weather sheet (inhaul) you are using. The primary effect of the leeward sheet is controlling twist, so you’d set this sheet so the jib leech at the top is almost parallel to the center of the boat. If the leech telltales stall, ease.
Put reference tape marks on the spreaders at 3” (7.6cm), 6” (15.2cm), and 9” (22.9cm) in from the spreader tip. In general, you should trim the jib so that it is at the spreader tip in very light air, 3” (7.6cm) inside the tip in light air, 6”–9” (15–23cm) inside the tip in moderate air, then back out to 3” (7.6cm) in heavy air.

Weather Jib Sheet (Inhauler)
In the J105, the weather jib sheet can be used to inhaul the jib. This narrows the sheeting angle (jib gets closer to the mast) which allows the boat to point higher. A good all-purpose setting is to have the jib clew sitting over the handrail.

More weather sheet will pull the jib to windward and forward. This narrows the slot, and deepens the jib foot. Less weather sheet will allow the jib to move outboard and aft, widening the slot and flattening the foot. It is critical to move the jib cars depending on how much inhaul you are using.
Weather sheeting requires practice and close attention. It helps to have marks on both sheets, so settings can be duplicated more easily.
Jib Cars
Base jib car position for 12kts is 196” measured from the headstay/deck intersection to the forward edge of the jib car block. This is a good position for weather sheeting to the cabin top handrail. You’ll notice that when you have no weather sheet on, the jib foot is very flat. And when you weather sheet, the foot has depth. So, it is important to move the jib car forward when weather sheeting less, putting shape into the foot of the jib.

Measure back from the headstay/deck intersection to the front edge of the jib car block. This should measure 196” or 4.98m at base.
Headstay Tension
Headstay tension has the most dramatic effect on the overall camber of the jib. This is a difficult thing to visualize, but it works much the same as mast bend affects mainsail shape. As the headstay sags, it pushes the luff towards the leech, which increases camber. Conversely as the headstay gets tight, it pulls the luff away from the leech, decreasing camber.
Headstay tension is achieved by a combination of a tighter rig and a tight backstay. As we have learned in the rig tuning and main trim sections, rig tuning and backstay tension has a great effect on mainsail camber as well. If you are tuned properly, when the main sets up correctly, the headstay tension will be correct as well.

Part 5: Crew Weight Placement
The goals of weight placement are to 1) control helm and 2) reduce wetted surface in light air. The positions below assume a crew of five (helmsman + four crew), which is typical for J/105 racing.
Light Air
In light air the crew should be well forward and to leeward both upwind and down. Two crewmembers should be forward of the shrouds to leeward. The remaining crew should be up near the shrouds. There should only be one person in the cockpit other than the helmsman. In light air the helmsman can make small adjustments to the main. Bodies to leeward helps heel the boat increasing helm giving a better feel. It allows for the best pointing and rudder lift. Being forward allows the bow to dig in which also helps pointing as well as reduces wetted surface by getting the transom out of the water.
Moderate Air
In moderate air, the crew can slide back as they begin to move to weather. Once anyone goes to weather, they should be stacked just behind the shrouds. If you have a dedicated main trimmer, he can slide back to his station. Downwind as soon as there is constant adequate pressure on the sheet the crew should move to weather (around 10 kts). This helps rotate the spinnaker to windward out from behind the main.
Heavy Air
In heavy air, the crew should continue to move aft, especially in waves. Since crew weight is limited, everyone on the rail needs to hike as hard and as consistently as possible — even small improvements in hiking discipline add up over a race.
Part 6: Downwind Sailing
Sailing the J/105 downwind can be one of the more difficult things to do well. Paying small attention to minor details can make a huge difference. The key to fast sailing downwind is good communication between the trimmer and the helmsman. The trimmer should constantly be telling the helmsman how much pressure they have in the sheet. This will allow the helmsman to know if they can bear off a little more, but more importantly when to head up to build pressure. Designate one crew specifically as the puff caller — downwind you will see roughly half as many puffs as upwind, and having dedicated eyes looking aft to identify them early is critical to staying in pressure. Before bearing away at the windward mark, ease the cunningham first, then the vang, then the backstay all the way off — a tight backstay downwind flattens the sails and kills power when you need it most.
The J/105 has an asymmetric spinnaker set on a centerline sprit. The goal of downwind sailing is to maximize downwind VMG (Velocity Made Good — your effective speed toward the leeward mark). This is achieved by sailing a wind angle tight enough to keep speed but sailing lower towards the mark whenever possible. The North Sails asymmetric has been designed as a running spinnaker for optimum downwind performance. The sail has been designed to rotate to windward to project the maximum sail area out from behind the mainsail. Always hoist the sail all the way to the top. Due to the luff length restriction in the rules, the tack of the sail is never set all the way down to the pole. Raising the tack helps the sail rotate to windward.
Light Air Sailing (0-9 knots TWS)
In light air, you must sail tighter angles for best VMG. The tack is set tight to the sprit. The crew should be forward and to leeward. Keep the crew weight as low as possible. Steer down in the puffs until the pressure sheet starts to get light and then head up slightly. Communication between the trimmer and the helmsman is key. Try to find the lowest angle you can sail before the speed drops. Don’t forget about the main! Proper mainsail trim is essential to good speed. The vang should be set so that the top batten is open by 5 degrees.
To gybe, the helmsperson should slowly bear away as the spinnaker is eased to the forestay and then quickly brought around with the new sheet. The main trimmer should hold the boom out. The boat is heading dead downwind as the spinnaker clew almost reaches the shrouds; then the driver can accelerate the turn. Boom comes over and the driver finds their exit angle. The goal is to have the kite beat the boom and almost fill on the new side before gybing the main.
Moderate Air Sailing (9-18 knots TWS)
In moderate air, there is a wide range where you can sail. Lower is best as long as you can maintain your speed. The tack line is eased a couple feet off the sprit. This will allow the spinnaker to rotate the weather which will help you sail deeper.
The same principles apply to steering as in light air. Once the boat feels well pressured, the crew should move to the windward side to help rotate the spinnaker. In this range the crew should be very active moving to weather when you head down in the puffs and back to leeward when you head up in the lulls.
Gybing is like light air but can happen a little faster. The boom won’t need to be held and can be brought over as the spinnaker clew gets a few feet past the headstay. Pull the spinnaker around fast.
Heavy Air Sailing (18+ knots TWS)
In over 18 knots, the boat is well pressured up going downwind. At this point you want to sail as low as possible most of the time. There will almost always be good pressure on the sheet but when you sail too low, the sail will become blanketed behind the main and collapse. The sheet is well eased to get as much of the sail out from behind the main as possible. The crew should be windward at all times. Heel the boat to windward by as much as 10 degrees. The vang should be set so the top batten is parallel to the boom.
For a heavy air gybe you’d still like to see the clew of the spinnaker make it around the headstay before the boom comes over. Pull the spinnaker around fast!
Downwind Notes
Good coordination between the trimmer and helmsman will result in very subtle changes in the sheet. A properly coordinated team will only adjust the sheet by a couple of feet. If you find yourself constantly trimming and easing more than 3 feet of sheet than your coordination should be improved. Be careful not to try to sail too low and collapse the spinnaker. A collapse will result in around a three-boat length loss.
Part 7: Sail Care & Storage
Sails are expensive and performance-critical and the class’s limited inventory means you cannot simply replace a tired sail mid-season. How you handle the sails off the water matters.
Take the Jib Down After Racing
A furled sail still bakes in the sun along the exposed leech and foot. The jib should come down after racing, be flaked or rolled, and bagged out of the sun. Most competitive teams drop the jib at the dock every day rather than leaving it rigged.
Roll the Main and Jib — Don’t Leave the Race Main Flaked on the Boom
Most top teams roll both the main and the jib rather than flaking them. Roll the main from the head down, keeping the battens straight, and store it in the bag.
Inspect, Log Hours, and Service
Keep a rough log of how many days each sail has been used — as noted in the jib trim section, an older sail’s entry gets finer and its draft moves aft, requiring more halyard tension to hold shape. Tracking hours helps you plan when to rotate a sail to practice duty and bring a fresh one out for key regattas. If anything looks marginal, get it to your North Sails loft for service.
Glossary of Key Terms
Athwartships — Side to side across the boat (perpendicular to the centerline).
Backstay — The rod running from the masthead to the stern. Tensioning it bends the mast and tightens the headstay.
Caps / Cap Shrouds (V1s) — The upper shrouds running from the hounds to the chainplates. Primary support for the rig side-to-side.
D1s (Lowers) — The lower shrouds, attached at the bottom spreader. They primarily control fore-aft mast bend in the lower section as well as side sag.
D2s (Intermediates) — The intermediate shrouds, attached at the top spreader. They help control fore-aft mast bend as well as side sag.
Draft — The deepest point of curvature in a sail. “Draft forward” means the fullest point is near the luff; “draft aft” means it’s toward the leech.
Headstay Sag — How much the forestay (headstay) bows to leeward under load. More sag = fuller jib; less sag = flatter jib.
In Column — The mast is straight up and down, with no side-to-side bend. Checked by sighting up the sail track from the gooseneck.
Loos Gauge — A handheld tool that measures wire or rod tension. The RT-10M model is required for J/105 rod rigging. Numbers are relative (not pounds); use the values in this guide to match settings.
Prebend — A slight forward curve built into the mast at rest, before any sail load.
TWS — True Wind Speed. The actual speed of the wind, as opposed to apparent wind (what you feel on the moving boat).
VMG (Velocity Made Good) — Your effective speed directly toward a mark. Maximizing VMG means finding the best balance of boat speed and angle.